Mouse computer
Touchpad dan pointing stick pada Laptop IBM
Sebuah perangkat penunjuk adalah antarmuka input (khusus perangkat antarmuka manusia) yang memungkinkan user untuk ruang masukan (misalnya, terus menerus dan multi-dimensi) data ke komputer. sistem CAD dan antarmuka pengguna grafis (GUI) memungkinkan user untuk mengontrol dan memberikan data ke komputer dengan menggunakan gerakan fisik – titik, klik, dan tarik – misalnya, dengan menggerakkan mouse genggam di seluruh permukaan dari desktop fisik dan mengaktifkan switch pada mouse. Mutasi perangkat penunjuk yang bergema di layar dengan gerakan penunjuk (atau kursor) dan perubahan visual lainnya.
Sementara perangkat penunjuk yang paling umum sejauh ini adalah mouse, lebih banyak lagi perangkat telah dikembangkan. Sebuah “tikus” adalah istilah teknis yang merujuk ke perangkat yang menghasilkan input mouse seperti. Namun, “mouse” istilah yang biasa digunakan sebagai metafora untuk perangkat yang memindahkan kursor.
Untuk perangkat menunjuk kebanyakan, hukum Paulus Fitts bisa digunakan untuk memprediksi kecepatan dengan mana pengguna dapat menunjuk pada posisi target.
Mouse
mouse adalah perangkat genggam kecil ditepis permukaan horizontal.
mouse pointer bergerak grafis dengan menjadi meluncur di permukaan halus. Mouse roller-bola konvensional menggunakan bola untuk membuat tindakan ini: bola yang bersentuhan dengan dua poros kecil yang diarahkan dengan sudut yang tepat untuk satu sama lain. Seperti bola bergerak memutar poros ini, dan rotasi diukur oleh sensor di dalam mouse. Informasi jarak dan arah dari sensor kemudian ditransmisikan ke komputer, dan komputer grafis bergerak pointer pada layar dengan mengikuti gerakan mouse. Lain mouse umum adalah mouse optik. Perangkat ini sangat mirip dengan mouse konvensional tetapi menggunakan cahaya tampak atau inframerah bukan bola-rol untuk mendeteksi perubahan posisi.
Mini-mouse
Sebuah Mini-mouse mouse telur berukuran kecil untuk digunakan dengan komputer laptop, biasanya cukup kecil untuk digunakan pada area bebas dari tubuh laptop sendiri, biasanya optik, termasuk kabel ditarik dan menggunakan port USB untuk menghemat baterai .
Trackball
trackball adalah perangkat penunjuk yang terdiri dari sebuah bola ditempatkan dalam soket yang mengandung sensor untuk mendeteksi rotasi bola sekitar dua sumbu, mirip dengan sebuah mouse terbalik: sebagai pengguna gulungan bola dengan ibu jari, jari, atau telapak mouse kursor pada layar juga akan bergerak. berita bola biasanya digunakan pada CAD workstation untuk kemudahan penggunaan, mana mungkin tidak ada ruang meja yang untuk menggunakan mouse. Ada yang mampu klip ke sisi keyboard dan memiliki tombol dengan fungsi yang sama sebagai tombol mouse. Ada juga trackball wireless yang menawarkan berbagai posisi ergonomis yang lebih luas kepada pengguna.
Joystick
* Isotonik joystick yang menangani tongkat dimana pengguna dapat dengan bebas mengubah posisi tongkat itu, dengan kekuatan kurang lebih konstan.
o Joystick
o Analog stick
* Isometric joystick – dimana pengguna kontrol tongkat dengan memvariasikan jumlah angkatan mereka mendorong dengan, dan posisi tongkat tetap kurang lebih konstan.
Sebuah tongkat penunjuk (joystick) adalah inti tekanan kecil sensitif digunakan seperti joystick. Ini biasanya ditemukan pada laptop tertanam antara ‘B’ yang ‘G’, ‘H’ dan kunci. Beroperasi dengan merasakan gaya yang diterapkan oleh pengguna. Yang sesuai “mouse” tombol biasanya ditempatkan tepat di bawah spacebar. Hal ini juga ditemukan pada tikus dan beberapa keyboard desktop.
Touchpad
Sebuah touchpad atau trackpad adalah permukaan datar yang dapat mendeteksi menghubungi jari. Ini adalah perangkat penunjuk stasioner, umumnya digunakan pada komputer laptop. Setidaknya satu tombol fisik biasanya dilengkapi dengan touchpad, namun pengguna juga dapat menghasilkan klik mouse dengan menekan di kertas. Fitur lanjutan mencakup sensitivitas tekanan dan gerakan khusus seperti bergulir dengan menggerakkan jari seseorang sepanjang tepi.
Ini menggunakan grid dua lapisan elektroda untuk mengukur gerakan jari:. Satu lapisan memiliki strip elektroda vertikal yang menangani pergerakan vertikal, dan lapisan lain memiliki strip elektroda horisontal untuk menangani gerakan horisontal
Tablet Graphics
Sebuah tablet grafis dengan pena
Sebuah tablet grafis atau tablet digitalisasi adalah tablet khusus mirip touchpad, tetapi dikontrol dengan pena atau stylus yang dimiliki dan digunakan seperti biasa pena atau pensil. thumb biasanya mengontrol mengklik melalui tombol dua arah di bagian atas pena, atau dengan menekan di permukaan tablet itu.
Sebuah kursor (juga disebut keping) yang mirip dengan mouse, kecuali bahwa ia memiliki jendela dengan rambut salib untuk menentukan penempatan, dan dapat memiliki sebanyak 16 tombol. Sebuah pena (juga disebut stylus) terlihat seperti bolpoin sederhana namun menggunakan kepala elektronik, bukan tinta. Tablet ini mengandung elektronik yang memungkinkan untuk mendeteksi gerakan kursor atau pena dan menerjemahkan gerakan menjadi sinyal digital yang mengirimkan ke komputer “. [4] Hal ini berbeda dari mouse karena setiap titik pada tablet merupakan titik pada layar.
Touchscreen
touchscreen adalah perangkat embedded ke dalam layar monitor TV, atau sistem monitor LCD layar komputer laptop. Pengguna berinteraksi dengan perangkat dengan menekan fisik item yang ditampilkan pada layar, baik dengan jari-jari mereka atau beberapa alat bantu.
Beberapa teknologi bisa digunakan untuk mendeteksi sentuhan. touchscreens resistif dan kapasitif memiliki bahan konduktif tertanam dalam gelas dan mendeteksi posisi menyentuh dengan mengukur perubahan arus listrik. Inframerah pengendali proyek grid sinar inframerah disisipkan ke bingkai yang mengelilingi layar monitor itu sendiri, dan mendeteksi di mana objek penyadapan balok.
touchscreens modern dapat digunakan bersama dengan stylus menunjuk perangkat, sementara mereka yang didukung oleh infra merah tidak memerlukan sentuhan fisik, tapi hanya mengenali gerakan tangan dan jari dalam beberapa rentang jarak minimal dari layar nyata.
Touchscreens menjadi populer dengan pengenalan komputer palmtop seperti yang dijual oleh produsen perangkat keras Palm, Inc, beberapa kelas range tinggi komputer laptop, smartphone mobile seperti HTC atau iPhone Apple Inc, dan ketersediaan standar driver perangkat touchscreen ke Symbian, Palm OS, Mac OS X, Windows XP dan Windows Vista sistem operasi.
Perangkat lain
* Lightpen
adalah perangkat yang mirip dengan layar sentuh, tetapi menggunakan pena khusus yang sensitif cahaya, bukan jari, yang memungkinkan untuk input layar lebih akurat. Sebagai ujung pena cahaya membuat kontak dengan layar, ia mengirim sinyal kembali ke komputer yang berisi koordinat dari pixel pada titik tersebut. Hal ini dapat digunakan untuk menggambar pada layar komputer atau membuat pilihan menu, dan tidak membutuhkan layar sentuh khusus karena dapat bekerja dengan monitor CRT berbasis.
* Lampu pistol
* Palm mouse
diadakan di telapak tangan dan dioperasikan dengan hanya dua kancing; gerakan di layar sesuai dengan sentuhan bulu, dan meningkatkan tekanan kecepatan gerakan.
* Footmouse
kadang-kadang disebut mol – varian tikus bagi mereka yang tidak ingin atau tidak dapat menggunakan tangan atau kepala, melainkan menyediakan footclicks.
* Mirip dengan tikus adalah puck
yang, daripada melacak kecepatan perangkat, melacak posisi absolut titik pada perangkat (biasanya satu set bidik dicat pada tab plastik transparan mencuat keluar dari atas keping ). Pucks biasanya digunakan untuk pelacakan dalam CAD / pekerjaan / CAM CAE, dan sering aksesoris untuk tablet grafis yang lebih besar.
* Perangkat pelacakan mata
Sebuah mouse dikendalikan oleh bola mata pengguna / gerakan retina, memungkinkan kursor-manipulasi tanpa sentuh.
* Jari-mouse
Sebuah mouse sangat kecil dikendalikan oleh dua jari saja; pengguna bisa menahannya dalam posisi apapun
* Gyroscopic mouse
Sebuah indera giroskop gerakan mouse ketika bergerak melalui udara. Pengguna dapat mengoperasikan mouse gyroscopic ketika mereka tidak memiliki ruang untuk mouse biasa atau harus memberikan perintah sambil berdiri. Ini perangkat input tidak memerlukan pembersihan dan dapat memiliki banyak tombol tambahan, pada kenyataannya, beberapa laptop merangkap sebagai TV datang dengan tikus gyroscopic yang mirip, dan ganda sebagai, remote dengan layar LCD built in
* Steering wheel
dapat dianggap sebagai perangkat penunjuk 1D – lihat juga bagian roda kemudi artikel game controller
* Wii Remote (/ Wiimote) – fungsi pointer dengan kontrol motion sensing di Wii
* Laser pena – dapat digunakan dalam presentasi sebagai perangkat penunjuk
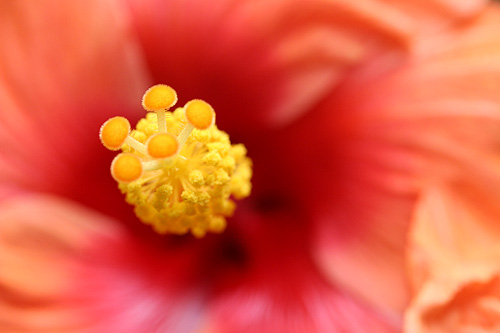
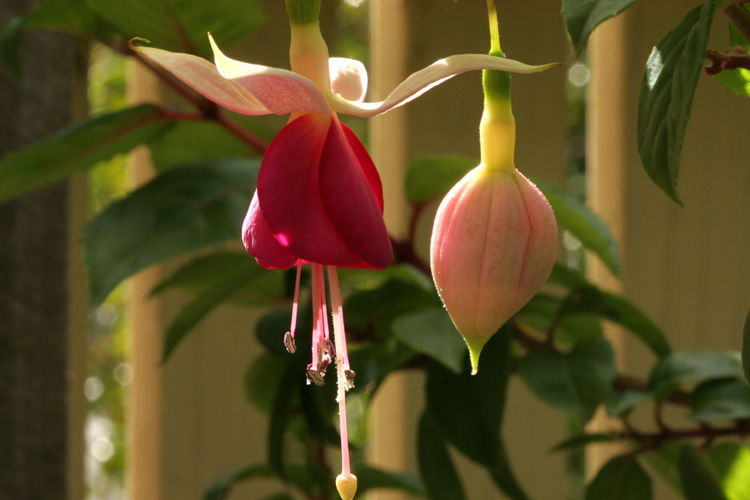
 Photo: Rainer Ebert used under CC license
 Fig 1.5.1 The iris opens and closes to change the aperture.


 Photo:


 The following post is from Australian photographer
  Fig 1.2.1 A light shone into a glass
 Fig 1.2.2 As light passes into a more


 Photo:


 Fig 1.3.8 The comparative differences in frame size from compact camers through film and DSLR to medium format.
 Photo:
  Fig 1.4.1: From a base exposure, the exposure is increased and decreased in one stop steps to +/- 4 stops.
 Fig 1.4.2: The exposure triangle.